How to Make a Really Good Cup of Coffee


Are you pretty sure you don't like coffee? Are you finding that you like coffee that you buy, but you just can't get as good a tasting brew at home?
Is that daily cup of coffee you purchase starting to make a dent in your finances?
Whatever your reasons, learning to make a really good cup of coffee at home is an art. Many people who swear they dislike coffee actually find they like it when it's made well.
And you can save yourself some money by making your own coffee and toting it to work.
So here are some tips on making a really good cup of coffee at home.
1. Clean Machine
The number one killer of good coffee is a dirty coffee maker. Make sure your coffee maker is clean before you start!
Clean your coffee maker with 1 part vinegar and 2 parts water; run it through the coffee maker and then follow with 2 pots of fresh, clear water.
Disassemble it, and allow it to dry overnight before putting it all back together.
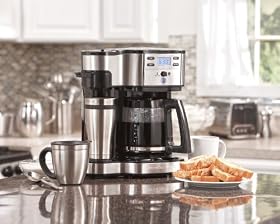
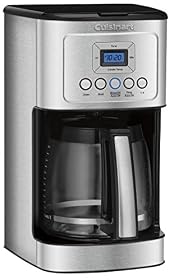
2. Which Machine Is Best?
Have you ever wondered why some coffee makers are less than $25 and others are over $250?
It's because the really expensive ones really do make better-tasting coffee, so buy the best one you can afford.
The higher-priced models are made with stainless steel and materials other than plastic, which preserves the taste of the coffee over time.
The more expensive machines also get the water hotter, which, as we will see below, makes a difference in taste.
By the way, yard sales and garage sales are a great place to look for second-hand but high-quality coffee makers for little money.
You can also forego a machine altogether and use a French press . Some maintain that the French press is the ideal way to make the perfect cup of coffee.
3. Water
If you are using tap water, it's likely that your coffee won't taste as good. It's also going to speed up the calcification of the inside of your machine, especially if you have hard tap water.
Use filtered water for best results, and make sure it is fresh and cold.
4. The Beans
Now that your machine is clean and your water is fresh, cold, and filtered, it's on to the actual coffee beans.
Coffee beans grow stale quickly. If you get pre-ground coffee, buy small quantities so you use it up quickly.
Its freshness only lasts about a week. If you really want a good cup of coffee, though, get whole coffee beans and invest in a grinder.
Go for high-quality beans, not the typical mass-produced stuff. If you have a local coffee shop, get your beans there instead of at the grocery store.
5. How Much?
The general rule of thumb is, 2 tablespoons of freshly-ground coffee per 6-ounce cup of water. Some people like to add one extra tablespoon at the end just for extra strength.
6. Drink It Soon
Drink your coffee as soon as possible after it's brewed. It starts to lose flavor after a while, so brew in small batches.
There you have it! With a little trial and error, you should be well on your way to making a really good cup of coffee.
Frothing for Newbies
Ever wonder why some cappuccinos and lattes taste better than others even when they are made from the exact same ingredients? Chances are the taste variation is in the froth or foam that sits on top.
A good froth has a smooth texture because it’s created with the smallest of bubbles, referred to as microfoam. These little bubbles are so small you have to look close to see them.
The collection of large bubbles you often see on your morning drink is what leaves the froth dry, flat and tasteless.
There’s not much you can do about the froth if you’re purchasing from a coffee house, except maybe suggest that someone teach the baristas how to create great froth.
However, you certainly can create steamed milk with smooth froth at home, with very little effort.
A great latte (coffee, steamed milk and a little froth) or cappuccino (coffee, little milk and lots of froth) starts with having the proper milk temperature; 150-160 degrees Fahrenheit (65 -70 C).
So it’s important that you use a thermometer to get it right.
Also note that when using an espresso machine, you will want to turn the steam off at approximately 5 to 10 degrees before reaching the desired temperature.
Since the thermometer doesn’t adjust instantly, it will continue to rise for a few seconds after turning off the steam.
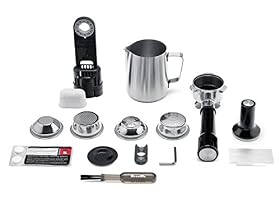
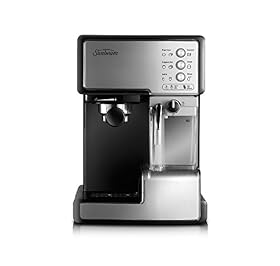
If you’re considering purchasing an espresso machine for your home be sure to do your research. Read user reviews on several models before you make your purchase.
Most machines will produce a decent coffee and can steam milk well enough but a good espresso machine will be able to create great froth with its built-in steam wand.
While a good machine will go a long way towards creating a great drink, there is a little more to it than simply turning the steam wand on, heating the milk to the desired temperature and spooning the froth onto your drink.
Rather than just sticking the steam wand into the milk, you want to keep the froth hole at the surface of the milk.
If you look closely at your steam wand, you should see a small hole on one side. This is what we’re calling the froth hole.
Keeping this hole at the surface of the milk will allow milk to be drawn in, creating a denser, smoother froth.
Furthermore you may want to hold the pitcher at a slight angle so the steam wand is resting at the side of the pitcher. This allows the milk to swirl around the pitcher helping to create great froth.
Many baristas think that during steaming that the froth should always be at the top of the milk.
This isn’t true. During this step, you want the froth and milk to intermingle.
As the milk expands into froth, you will need to gradually lower the level of your pitcher so the froth hole stays at the proper level.
The more you work the milk, the more froth you will create. When poured into your cup is when you want to see the froth sitting on top.
So to recap how to make a great froth, here are the steps.
1. Start with cold milk and a clean, cold pitcher
2. Only use as much milk as you need – never try to re-steam milk
3. Use a thermometer to achieve the right temperature (150-160 degrees Fahrenheit)
4. Keep the froth hole at the surface of the milk
5. Work the milk until you get the amount of froth you are seeking. Traditionally you want the milk volume to expand by 1/3 for lattes and 1/2 for cappuccinos
6. Pour the desired amount of milk into your cup then spoon on the froth
Here are a few more tips to help get a great froth.
Milk – Start with cold milk. You can froth just about any type of milk, including soy, rice and almond. The fat content in milk directly impacts the results.
Non-fat milk foams the best whereas whole milk is much harder to coax good foam from. However, there’s nothing quite like a cappuccino or latte made with whole milk.
When you turn off the steam wand and before you pour, tap the side of the pitcher several times, give it a couple of quick spins and then let it rest for just a moment. This will help pop some of the larger bubbles and create a smoother texture.
If you don’t own an espresso machine you can froth by hand.
Start by warming the milk on the stove or in the microwave to reach the desired temperature. Pour the warmed milk into a coffee cup. Insert a small hand whisk into the cup.
Place your hands on either side of the whisk handle and quickly ‘roll’ the handle back and forth between your hands until you have the desired amount of froth.
You can also purchase stand-alone frothing machines and even battery operated whiskers if you prefer.
Getting the proper froth will take practice so don’t get discouraged. Since you are enjoying each cup with or without perfect froth, you have plenty of time to get it right.
Did you find this post fun, informative and useful? If so, please share it with others!
If you have a comment, question or suggestion, please leave a comment below!
Cheers, Helene Malmsio
Related Reading: https://www.discoveryhub.net
Comments for How to Make a Really Good Cup of Coffee
|
|
Click here to add your own comments Join in and write your own page! It's easy to do. How? Simply click here to return to Home & DIY. |

"Power Tips" magazine is back!
You Get A Free Complete Self Help Report delivered to your email box every edition, plus you get a free PLR article and other great gifts!
SUBSCRIBE BELOW ... I promise you will want to USE what you learn!

I really want to know what you think of this site, this page, and to hear your tips or suggestions about it.
So please share your story or simply add a Comment in the comment box.
If you feel that the information on this page has been useful to you please give it a Like or share it with your friends - thanks!!
"You are a life Saver!!
I recently discovered this site and I can tell you that my life has not been the same. I now come here EVERYDAY and spend at least 1 hour.
I used to spend that time browsing online fashion and beauty
magazine which just means that I spend more. Now I have replaced that
habit with coming here.
In future I will think about contributing articles as well. Thank you! Thank you!! Thank you!!! and God bless"

Contact Us | About Us | Terms of Use | Privacy Policy | FAQ | Testimonials
Amazon and the Amazon logo are trademarks of Amazon.com, Inc. or its affiliates. As an Amazon Associate I earn from qualifying purchases. Product prices and availability are accurate as of the date/time
indicated and are subject to change. Any price and availability
information displayed on [relevant Amazon Site(s), as applicable] at the
time of purchase will apply to the purchase of this product.

"Power Tips" is back!
Free Complete Self Help Report inside every edition, plus free PLR article and other great gifts!
SUBSCRIBE BELOW ... I promise you will want to USE what you learn!
You can subscribe to my RSS feed to get updated whenever new content is added here!
 Subscribe To This Site


