How To Make Candles That Are Fun And Fast!
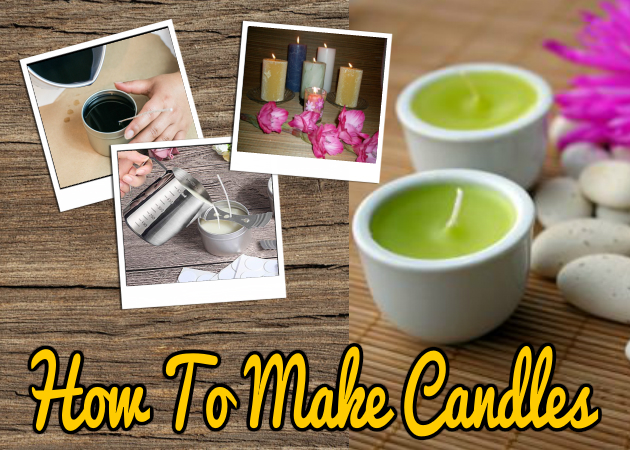
Learning how to make candles is fun, and hand-crafted candles make great gifts! It requires very little special equipment.
I love making my own soy candles for my home, and adding my favorite scents to create healthy aromatherapy for myself at the same time.
Candles are one product that almost every single home has, which also makes them a great gift for all occasions year round.
Whether you use them for decorative purposes, to create a pleasant smell, or just to use in the case of an emergency, candles are a necessity.
Good news—you can stop spending your money on candles and start making them yourself.
Making candles is not as complicated as you may think.
In fact, candle making is a great craft project to do with older children or beginning crafters.
Supplies You Need to Make Candles:

When you are learning how to make candles, all you really need is wax, a wick, and a container for molding the candle or tin cans (to use for dipping candles).
You'll need a candy thermometer to measure the temperature of the melted wax and plenty of newspaper to work on (and spill on).
Scents and colors can be added to make your candles more interesting, and a variety of kits on the market can help you further make a quality product.
I buy natural soy candle wax and all my supplies online and have them delivered to my door - very convenient!
Depending on what materials you'll be using or what technique is involved in your project, the instructions can become a lot more complex. Use your imagination to create beautiful candles.
For example, if you want to make dipped candles, you will suspend the wick, then dip the wick into the liquid wax, then take it out, and let it harden and then continue repeating the process until the candle has the correct width or breadth that your project requires or that is correct for the size or type of wick that you are using.
Molded candles take a completely different set of candle making instructions.
For a molded candle you center the wick in the mold and pour the liquid candle wax into the mold.
When the mold is filled with the liquid wax you can trim the wick to the right length.
There are molds shaped like spheres or simpler molds that offer a design or form to your candle that you can lift out of the mold.
One of the easiest candles to make also has some of the easiest candle making instructions. Making candles with wax beads or soy wax flakes is very easy.
Find a suitable glass jar or vase and spoon in the wax beads and center the proper wick. Now the bead candle is ready to be used.
You can change the effects or the mood with this type of candle by simply changing either the wax beads or the glass container.
Here on this "how to make candles" page you will find candle making instructions for practically every kind of candle.
You can make just about any kind of candle provided you have the right wax, mold, color, scent, and decorations. You can also create your own personal variations.
Creating a candle whether simple or ornate requires you to have the right equipment, after you find the correct instructions for your project, read the instructions carefully so you can determine if you have all the right equipment or if you'll have to buy or better yet borrow them
Then all you'll need is the right supplies and you'll be on your way to creating candles in no time.
I have also published two books for you about how to start a candle making business, in case you love making candles so much that you want to sell them as a home business too!
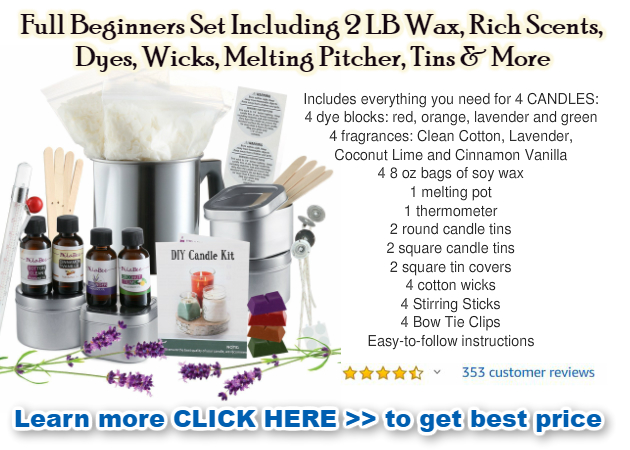
The easiest way to begin is with a DIY candle making kit!
Where to begin:
Wax: The Different Types of Candle Wax Used for Candle Making and Their Properties
There is a variety of candle wax available nowadays and they all function in different ways. Some of them melt faster to its liquid form as compared to others.
Although paraffin has come to be the chief ingredient in almost all candles, there are other materials you can use.
Owing to the huge demand for candles in the marketplace nowadays, many stay-at-home moms have ventured into the candle making business to earn a significant income while working from home.
Due to this very reason, sales for various types of candle wax have also increased.
Choosing the type of wax for your candles is an important decision to make when you get into the candle making business.
What is a candle without its light? And without proper fuel there will be no light!
Wax is the essential fuel which is required to light up your candle. Each type of candle wax has unique properties.
Go for a type of candle wax according to the requirements you have in mind.
Various Types of Wax
Paraffin Candle Wax – Arguably the most popular type of candle wax used for making candles is paraffin wax.
It is petroleum based and readily available in various stores online as well as offline.
Paraffin candle wax comes in two forms – in blocks and in powdered form. You even get variations of paraffin wax in colored forms.
If you wish to add color yourself, you can do so by purchasing the required candle colors from your local store.
Paraffin, a petroleum byproduct, is by far the easiest and least expensive material for making candles today.
It comes in several grades, the hardest of which can be found at craft stores. One 10-pound slab makes about 4 quarts of liquid wax.
For firmer, brighter-burning candles, add 3 tbsp of powdered stearin per pound of paraffin.
Soy Candle Wax –
This type of wax is made from soybeans. The popularity of soy candle wax is increasing because it is environmental friendly and is naturally broken down into harmless components.
Moreover, soy candle wax is available at cheap rates at various stores.
Beeswax –
Another type of wax used in candles is the one which bees use in their beehives.
This variation is pretty expensive and is not recommended if you are planning to make candles in large numbers.
Apart from that, beeswax also has a natural fragrance to it which makes it unnecessary to add any extra scents into the wax mixture.
Beeswax can be expensive, because modern day beekeepers don't harvest the honey comb.
However, you can still buy beeswax at craft stores, or you can make your own if you want to keep a bee hive and are willing to sacrifice some honey.
Gel Candle Wax –
In order to create a gel candle wax, you will have to use a mixture of a gelling agent along with mineral oil. In case you see any candle which has bubbles in its wax, then rest assured the type of wax used is the gel candle wax.
The gel candle wax is clear to look at and the composition is somewhat rubber-like.
It comes with different densities of which the most popular one is that of medium density having around 3% fragrance capacity.
Tallow
Tallow is made by rendering animal fat can also be used. Beef fat is best, but sheep fat will work as well.
Use 1/2 pound of alum and 1/2 pound of salt peter to each pound of melted tallow to harden the candles and make them burn cleaner.
Bayberry
This is made from the tiny wax-coated fruit of the bayberry shrub, is a favorite for Christmas candles.
Gathered berries are boiled in hot water for 2 hours, then the green fat is skimmed off the top, re-boiled and strained.
Apart from these types of candle wax, there are many other varieties available in the marketplace nowadays.
Select the appropriate type depending on your budget, candle requirements and customer needs.
Here You can get your candle wax supplies delivered to your door:
Check out these products for the best prices and convenient home delivery!Buying your products online here on these links will usually save you on retail prices and may even include free shipping to your door sometimes.
Online shopping is a great way to check out other customer reviews and make sure you make an informed choice to best meet your needs.
Just click on the images below to view the full product info:


Wicks:
You'll need something to insert into the candle that will allow it to burn.
You can purchase wicks from
any craft store or make your own by dipping cords or heavy string into warm wax
and allowing to dry on a sheet of wax paper.
To make wicks the colonial way, soak heavy cotton yarn for 12 hours in one of these solutions:
- 1 tbsp salt
combined with 2 tbsp boric acid and 1 cup of water, OR A mixture
of turpentine, lime water and vinegar.
When the yarn is dry, braid 2 or 3 strands together to form the wick. The easier way is to buy ready-made wicks at your craft store.
Be sure that the wicks you buy fit the candles you plan to make.
A wick that is too large will cause your candle to smoke, too small will cause the flame to go out.

Candle colors:
You can buy dyes for wax at most craft stores or candle making supply company. Dyes come in solid (cakes or chips), powdered or liquid form.
To know how much dye to use, you should test the color of the dye by dripping a little bit of the melted wax onto a white piece of paper and letting it dry.
The actual candle color will be darker than what you see on the paper, but this should give you an idea of the finished color, and you can adjust the amount of dye accordingly.
You can also try using leftover stubs and pieces of old candles.
We do not recommend using crayons to color candles, unless the candle won't be burned.
Crayons contain pigments that can drown out the flame, giving you a poor burning candle.
If you are making candles that are used mostly for decorative purposes, like for Christmas table displays, you will find that one of the simplest and cheapest ways to color candles it to use old crayons.
Simply peel off the paper and melt the crayons with a double boiler.
If you use this technique, make sure you keep separating the colors, or you’ll end up with a muddy dark color.
You can also buy clear wax and use one or two crayons to tint it, instead of buying multiple colors of wax.
Candle Fragrances:
Fragrance oils can be purchased at many craft stores, candle making supply companies, and specialty fragrance companies.
For best quality (and for the best burning candles), it is best to use oils that are specifically made for use in candles.
The air freshener type oils you see in grocery and drug stores will work, but they may not blend as well with the wax. The oil should be pure oil with no water or alcohol base.
You'll want to experiment with the amount of fragrance oil.
Some candle makers use anywhere from 3 to 10% fragrance per pound of wax, some measure in tablespoons and use from 1 to 3 tablespoons per pound, and some measure in ounces and use from 1/4 oz. to 1/2 oz. per pound.
Essential oils (commonly referred to as EO's) are all natural oils derived from plants and flowers - not artificially composed like fragrance oils.
They are generally more concentrated and stronger than many fragrance oils (and much more expensive).
Candle makers have differing opinions as to whether EO's should be used to scent candles, due to their ability to bind with the wax.
Some candle makers have success with them using a special dilutant agent and some say they work fine on their own.
But many have said they do not blend and burn well. If you want to try using EO's, it would be best to get a book on aromatherapy and do some research before experimenting. Many of these oils should be handled very carefully.
When you are first learning how to make candles you can start out with free or cheap scents already in your home.
Herbs, cooking ingredients
like Peppermint and Vanilla and spices also work well for naturally scented candles.

Selecting containers for your candles:
You can use almost any kind of container to mold your candles. Jars work well, or you can use small molds if you want to pop out the candle when you’re done.
One neat way to make an interesting a unique candle is to use a milk carton and ice cubes.
Start by cutting off the top of a milk carton and pouring about two inches of wax in the button.
Before the wax is drying, insert a tall taper candle, relatively centered. Once that has dried, fill up the space around the candle with ice cubes, loosely packed.
Pour hot wax into the milk carton. It will instantly harden around the ice, creating an interesting Swiss cheese look.
After the ice has melted, simply pour out the water and rip off the carton.
For gifts, consider fun containers in which your candle can burn. A clear glass jar is great for layering different colors of wax.
Simply wait for each color to cool before adding the next. You can also use coffee mugs to personalize your candles to a person’s specific likes or dislikes.
Lastly, look for interesting shapes.
When you learn how to make candles with soy wax you will need to always have containers as they liquify very quickly and so do not make column candles.
I use every kind of container from drinking glasses, to delicate china tea cups, to strained glass jars for my soy candles.
Pour gel wax into martini glasses or use old wine glasses for a friend’s 21st birthday, for example. The possibilities are endless!
These gorgeous candle containers are perfect:
Just click on the images to view the full product info:


There are a few more things you will need before you practice how to make candles yourself, like:
WAX CARRIER:
A wax carrier is what you will use to heat the wax in as it melts.
A double boiler is excellent, but you can use a saucepan filled with water as an alternative, placing the actual wax into an old coffee tin and then into the water for heating.
This is how I have been melting my soy wax and paraffin wax, but I have recently bought an electric rice cooker to see how that works for melting wax and keeping it liquid while I pour and create my candles.
ADDITIVES:
Though not necessary, you can add things to your wax for decorative purposes.
Leaves, herbs, plastics and even jewelry can add pizzazz to your creation.
THERMOMETER:
A candy thermometer will be fine.
MOLD RELEASE:
You'll need this to ensure that you can safely remove the hard wax from your mold without damaging your candle.
Silicone spray, peanut oil or cooking spray oil will all work.
PENCILS/DOWELS:
You'll need one of these for each candle you're constructing as a wick holder.
I use icecream sticks with a hole in the middle that I thread the tip of the candle wick into and rest on the top of the container to keep the wick straight while I pour in the wax.
WOODEN SPOON:
For stirring wax.
WICK CUTTER:
Scissors work great.
Below I have found some online candle making kits that you can buy to get delivered to your home - very convenient and at great savings.
Check these for the daily best deals online in candle making kits:


Here are the instructions for specific kinds of candles and decorated candles you can also make:
Once you have your supplies in order, create a working space that will allow you to heat and transport warm or hot wax without too much difficulty.
It's good to clear off a fairly large amount of counter or table space so that your containers and candles can sit freely, without fear of tipping or being knocked over.
I place a layer of newspaper on the countertop to catch spills, and also on the carpet floor to catch any drips.
SAFETY FIRST!
1. Never leave melting wax unattended.
2. Always use a double boiler or the coffee cup in a can method to heat wax. Never place wax directly into a saucepan or heating device on it's own.
3. Never put water on a wax fire.
4. Never overheat wax.
Fumes from overheated wax can cause severe illness.
KNOW YOUR FLASH POINT
As an added rule of safety, be certain to use a thermometer when working with wax and familiarize yourself with the term "flashpoint."
Flashpoint is the temperature at which wax will combust. The Flashpoint is the absolute maximum that a given wax can be heated to.
If you're using Paraffin or simple canning wax, the Flashpoint is 375-degrees. That means you should keep your temperature well below 375-degrees for safety reasons.
THE MAKING OF A CANDLE
Now that your supplies are in order and you've read the safety material, it's time to make your candle.
1. Heat your double boiler or wax carrier slowly to the proper temperature, placing the unmelted wax into your carrier. Heating the wax to a temperature of 140-degrees is generally sufficient for all forms of Paraffin.
2. As the wax is in the beginning stages of melting, spray the inside of your molds with peanut oil, cooking spray or silicone spray and set them aside in an area where it's safe to pour the wax.
With soy wax the candle stays inside the container, so there is no need to spray the container.
3. Stir your melting wax gently with a wooden spoon.
4. Once the wax has completely melted, you can add to it anything that you'd like. This is the proper time to add scents (a little goes a long way!
No more than one teaspoon of oil or herbs is usually necessary.) and coloring. Allow the wax to cool slightly before you add your aroma oils.
I like to use color chips as they are easy to control to get just the right color blend that I want.
Gently stir the wax for a few moments, allowing the color to blend and the scent to mix.
5. Using a hotpad, lift your wax carrier out of the water and pour slowly into your molds. Do not fill to the top.
Leave at least a one-inch margin on the top of each mold.
I use an assortment of glass pouring jugs, like gravy jugs to pour the wax.
I immediately wipe the traces of wax from the jug when I finish pouring, that way it is ready to use without fuss the next time.
6. As your wax is hardening, get your wicks, tying one end to the middle of a pencil. Slowly drop the free end of the wick into the wax, and rest the pencil on top of the mold.
This will prevent your wick from falling into the wax as it's hardening.
Most kits supply wicks that have already been waxed so they are already quite firm and upright.
It will take several hours for your wax to harden to the proper consistency.
Many experts recommend allowing your wax to harden overnight before attempting to remove your candles from their molds, but this may not always be necessary, depending on the size of your candle.
Once the wax has hardened, you should be able to tip your mold upside down, allowing your new candle to slide out freely.
You can add decorations such as ribbons or flowers to the outside of your candle for gift giving, or place it in a decorative tray or box.
Remember, you're only limited by your imagination!
Dipping candles:
You'll need two tall cans (taller than the candles you'll be making). Melt the wax by filling a wide-bottomed pan (large enough to completely cover the burner) half-full of water.
Place the pan over a low heat.
Put your paraffin into the can and place the can in the water.
Never try to melt wax in a container set directly over a burner or flame.
Keep the melted wax at 150°-180°F during the dipping procedure.
The second can should contain water about room temperature.
Cut wicks 4 inches longer than the finished candle. Tie a washer to the lower end of each wick for weight.
Dip the wicks individually into the melted wax - or tie several to a piece of doweling and dip several at a time.
Pull up smoothly and dip in cooling can. After cooling the first dip, pull the wicks straight.
It will take about 30-40 dips to make a candle 1 inch in diameter.
For the final dip, add an extra tbsp of stearin per pound of wax to harden the candle's outer layer.
Cut the candle base straight with a sharp, heated knife and trim the wick to 1/2 inch.
Note. When melting wax, a double boiler (a pan use to melt the wax, that sits inside a pan filled with water) should be used.
I am experimenting with using an electric Rice Cooker to melt the soy wax for candles that I make.
Once you are able to make basic candles, you might want to try your hand at making hand-dipped candles.
This technique allows you to use several different colors all on the same candle, creating a truly unique design with your own personal flair.
These candles can be made to blend in with any home décor or color scheme.
You are probably already familiar with the basic candle making supplies, but there are some special necessities you will need to acquire if you want to make your own hand-dipped candles.
Some of them you already have on hand if you make candles on a regular basis, such as wax, either beeswax or paraffin, wicking material, and some sort of melting device or double broiled.
For hand dipped candles, you also will need to purchase several large wooden bowls and spoons, and a decent thermometer if you don’t already have one.
There are many different colors that you can use for your hand-dipped candles, and these colors come in many different formats.
You may find them in chips, liquid, powder, or even cakes.
To make fragrant hand-dipped candles, you must use scents that are oil based, with no water or alcohol whatsoever in the mix.
Melt your wax in the same way you do in traditional candle making, and allow it to heat until the thermometer reads around 160 degrees, that’s Fahrenheit, not Celsius.
Once that temperature has been attained, reduce the heat, and leave the wax on the heat source so it doesn’t start to solidify again.
At this point, you can start adding color to the mixture, adding small amounts until you reach the desired effect.
If you are adding fragrance, now is the time to do it, remembering moderation is the key.
The next phase will be preparing your wick, which should be cut so that it is longer than the total length of the candle you will be placing it into.
Make certain that you dip these trimmed wicks into your candle wax mixture as well.
Once the first coating cools, you will need to dip them again.
Have all of your colors on hand that you plan to use for your candles, so that they are readily available.
Continue dipping your candle into the wax mixture until it is the desired size, thickness, and smoothness.
As you probably already guessed, it takes quite a bit of time to make your own hand-dipped candles.
It is not the easiest type of candle to make either, but does yield some truly beautiful creations.
You shouldn’t attempt this type of candle making until you are proficient with regular candles, as it is very difficult.
To save money on supplies, if you make a mistake in your candles, you can melt them down, reusing the wax, which will save you some money on materials, until you have it down pat.
You can find more information on this type of candle making online, or from your local library or bookstore.
Molded candles:
This is what you will pour the hot wax into. Do you want your candle to be free standing or sit in a decorative container?
Cans, glass and hard plastics work great for simple molds.
Just about anything can be used for a candle mold: cardboard milk cartons, heavy glass mugs or old jelly jars, plastic foam cups, old plant containers.
Start by coating the inside of the mold with oil or silicone spray to make the candle easier to remove.
Some molds, like milk cartons, may need to be secured by tying string around the middle and base so that it holds its shape.
Cut a hole in the bottom of the mold. Thread wick through the hole and seal the hole with putty.
Pull wick tight and secure at the top of the mold by wrapping the end around a pencil or dowel.
Melt wax as described above.
For pouring wax, you might want to use a coffee can or other container that you can bend - just pinch/bend the rim to make a pouring spout.
Heat the wax to 130°F for cardboard, plastic or glass molds, and 190°F for metal molds. Lift the can with potholders and pour the wax into the molds.
Let the molds cool for 24 hours, then refrigerate for another 12 hours. Cardboard or plastic molds can be peeled off.
For glass or metal molds, turn the mold upside down and tap until the candle slides out. If it sticks, dip the mold in hot water.
Layered Candles:
These will take a little longer to make, as you'll need to give each layer time to harden before pouring in the next color.
Choose contrasting colors for a nice effect.
Another interesting effect is to alternate a layer of fine sand between the colored layers of wax.
Mix the sand with a little bit of melted wax, then pour in around the outside edges of your mold.
Let the next layer of colored wax fill in the center.
Lacy Candles:
This is a neat effect. Use a milk carton or other cardboard mold.
Fill the carton with ice cubes, and then pour in your melted wax.
For a solid base, pour about an inch of melted wax into the bottom of the mold, wait until it hardens just slightly, then add ice cubes and wax to fill the rest of the mold.
When the candle cools, peel the cardboard off carefully.
Dripping Candle Effect:
Take a finished molded candle and enhance it by dripping a different color wax down the sides.
Just light a tapered candle and hold it sideways over your molded candle, allowing the wax to drip down the side.
How to make Aromatherapy soy candles

If you have specific requirements in mind for that perfect
aromatherapy candle but you cannot find it anywhere in the vicinity, then the
good news is that you can create one yourself by following some simple
instructions!
Aromatherapy candles are really popular nowadays for its healing and relaxing properties.
They have even proved beneficial in treating illnesses and
relieving symptoms. Furthermore, certain essential oils in aromatherapy candles
have the power of boosting your system.
These are only some of the useful properties associated with aromatherapy candles.
You can bring the essence of essential oils to your own home by knowing how to make aromatherapy candles.
What all do you need to make aromatherapy soy candles?
- Containers – You will need quart-sized glass containers for your aromatherapy candles. Do you have any baby food containers, pickle jars lying around in your house? They work just fine as aromatherapy candle containers. Make sure that these glass containers are safe to light candles in. Plus, the opening of these containers should be wide enough to let the wax in.
- Wax – The best wax to make candles with is beeswax but they can be pretty expensive if you are opting to make large numbers. A natural and safe alternative is soy wax which is inexpensive as well. Paraffin wax is used for making candles but they are not suitable for indoor candle burning i.e. for aromatherapy candles. As far as possible, try to avoid using paraffin wax even if they are the least expensive. This is because they leave behind a lot of soot apart from being non-biodegradable.
- Wicks – You will be able to purchase wicks in a variety of sizes at your local store. It is also beneficial to use a wick setter but not really compulsory.
- Essential Oils – Do you have any particular fragrance in mind? If you are looking for a relaxing scent, then lavender would be perfect for you. Essential oils infused with lemon have medicinal properties and can relieve symptoms of flu or cold. By doing an extensive research online, you will be able to get a list of various essential oils along with their properties. Decide the one which is best for you and get it from your local health store. These essential oils can be even purchased online.
How to Make Aromatherapy Candles
Aromatherapy candle making differs from one type of wax to another. The way in which candles are made with beeswax is not the same as when made with paraffin wax or soy wax.
After purchasing wax you will get a set of instructions along with it. Follow these instructions carefully.
Once the wax flakes are completely liquefied, you can add few drops of essential oils.
The recommended dosage is 4-5 drops of oil for every 2 wax cups. If you want a more strong scent, you can increase the drops of essential oils accordingly.
Next you will have to stir all the ingredients thoroughly such that oil is well mixed with the wax.
Put the wick inside the container in an upright position using a wick setter if you have one, and pour in the mixture of wax and oils into the container.
After cooling, you can light your aromatherapy candle.
Benefits of Using Aromatherapy Soy Candles
Candles have been in use for many years. They have been used as decorative materialistic pieces or simply for its purpose of providing light.
Nowadays aromatherapy candles are used for distinctive hedonic purposes.
Out of all aromatherapy candle varieties, soy candles are the most popular owing to the natural ingredients used.
Why Are Aromatherapy Soy Candles Popular?
- Soothing Fragrances – Aromatherapy soy candles give out scents that are pleasing to the senses. The fragrances are light and hence not in the least overpowering. There are many scented candles out there which give out a strong aroma that only leave you behind with a headache. By using aromatherapy soy candles you can do away with this particular problem.
- No pollution – Aromatherapy soy candles do not pollute the air as much as compared to other candle varieties. In fact, they cause the least damage to the environment. This means you can breathe in the original fragrance without the stuffy smell of the burning candle. Since there is not much soot being let out, aromatherapy soy candles is healthy for the mind and body.
- Renewable and natural – Aromatherapy soy candles are biodegradable. This means that these candles break down harmlessly without causing any damage to the environment. On the contrary, candles which are made out of paraffin wax are non-biodegradable and are broken down into harmful materials.
- Traditional and effective – Aromatherapy soy candles have been used since ancient times to relieve the body from stress. They were not solely used for medicinal purposes but rather as a form to complement the treatment in itself. It was known that the sense of smell can affect a person’s mood and this was why the ancient medicine men believed in the healing powers of aromatherapy candles. Aromatherapy soy candles were used along with oils from plants to treat certain illnesses by relieving symptoms. Nowadays candles infused with eucalyptus oil are used to relieve allergy congestions or symptoms related to cold and flu.
- Relieves stress – You can use aromatherapy soy candles to undergo a basic meditation technique. All you need other than the candle is a comfortable cushion. By meditating, you are relieving your body and mind from unwanted thoughts and stress. If you are restless, then an aromatherapy soy candle with a scent of German Chamomile can be effective for you. For anxiety, Bergamot and sandalwood have been proved efficient whereas rose oil helps in combating depression. In order to reduce stress you can use aromatherapy soy candles containing jasmine, neroli, lavender, juniper or sweet marjoram.
- Ignites your Senses – It is very important to feel active before you set out to do anything important. If you are going to start on a strenuous project, a whiff of fresh essential oil scents can work wonders for your system.
Below I have found some great natural soy candle making kits to feature for you here:
They have everything you need in the kits that you need for how to make soy candles!


How to Make Gel Candles
Basic Instructions Melting ~ Follow regular candle making safety guidelines for heating, pouring and burning.
Melts at approximately 180-200 degrees & will take considerably longer to melt than wax. A covered Presto Kitchen Kettle, or similar, works great.
Wicks ~ We recommend using Gelwicks™ for containers up to 2 or 2.5" diameter.
Coreless Cotton container wicks can also be used if you prefer not to use a zinc core. Test burning will be necessary to determine proper size for your application.
Gel works best in containers no larger than 2.5 - 3 inches in diameter. Multiple wicks are not recommended.
Fragrance ~ It is recommended to use non-polar candle fragrance oils, with a flash point of 170 or higher. Stir thoroughly & be sure they blend well.
Recommended amount is up to 3% (.48 or approx. 1/2 oz) per pound for CLP, up to 5% (.80 or approx. 3/4oz) for CMP & up to 5% (.80 or approx. 3/4 oz) for CHP.
NOTE: It is important to follow these guidelines for making safe gel candles!
Coloring ~ It is recommended that less dye be used than in regular candles if you want to maintain the translucency of the gel. We recommend liquid dyes.
Color Blocks can also be used by shaving off tiny bits and melting into the gel.
Embedding ~ Non-flammable objects may be embedded in this gel, just let it cool to approximately 100 degrees before embedding.
Clean your seashells and other embed items so they are free of any residue by washing them with warm mineral oil. This will help keep the gel from clouding and help reduce air bubbles.
We recommend using only gel safe fragrance oils in your wax embeds.
Making Your Own Gel Wax From Scratch
Making your own gel wax from scratch is the best way to go. Some people like to make their own gel because it can be a lot cheaper than buying it pre-made, and you can control the density.
Ingredients needed
CP9000 Thermoplastic Resin Powder
White Mineral Oil with a flash point of 3750 F
You can choose between:
Low Density Gel (1lb Mineral Oil and 0.9 oz Resin)
Medium Density Gel (1lb Mineral Oil and 1.1 oz Resin)
High Density Gel (1lb Mineral Oil and 1.25 oz Resin)
Stand Alone Density Gel, which does not require a container to hold it. But does need to be on a stand of some kind. (1lb Mineral Oil and 1.4 oz Resin)
Directions
Choose your desired density; mix the proper amounts of mineral oil and resin.
Once mixed well, let sit for 1 hour.
When the mixture has sat for 1 hour, mix well until all the lumps are gone.
Heat your mixture up to 220° F on your stovetop, as your gel heats it will turn clear.
Pour your gel into a container and let it cool, once the gel has cooled seal with a tight lid.
Just click on the images to view the full product info:


Creative Gel Candle Ideas:
Easy as it is, making gel candles only need you to follow a few steps and you could achieve the finished product that you pictured out in your mind.
There are a lot of ways to make gel candles.
It could be by using simple quick steps from the internet or some more complex methods recommended by your neighbor who is into candle making.
Whatever it is, injecting some dose of your own creative ideas would make a whole lot of difference. What then are some tools you could use in making gel candles with your own brand of style?
As you follow the conventional steps of making gel candles, it would add to the fun if you consider the following tips:
Use other materials that would let you have fun explore your creativity while adding more elements of style.
Non-flammable things like sand, shells, metal charms, beads, marbles, pebbles, glitters, aquarium gravel, artificial jewel or pearls, and the like are among the most attractive things to have in your gel candle.
Add colors that suit the little things you add with your gel candle.
If you want the touch of “beach”, you use aqua blue while you put some shells, aquarium pebbles or gravel and miniature star fish in your candle.
You could also match the style you want to customize by mixing beads with glitters but consider color harmony as well.
Place some of these little objects at the bottom part of the container before freely putting them in the other portions of the container. This would hide the wick tab.
As you pour gel, add these tiny objects in layers. Take note that you need to place these objects away from the wick.
The tip is- the closer these objects to the outside portion of the container, the more “visible” they could be.
As you make the candles, you would enjoy the fact that you are playing with colors and style.
What makes the gel candles is that they were created out of pure pleasure and fun.
Personalizing these gel candles is another great idea. You could try to use cut-outs of your name.
As you insert your own brand of style, do not forget to work safely and do not risk quality of the product over appearance only.
There must be a balance of both.
When you feel like you have been training your self well in making custom gel candles, why not try it out as a small business?
How to make a gel candle with an aquatic theme

In order for you to bring that fun atmosphere of the beach, why not bring that sand and sea mood at home?
These helpful tips may let you try more options:
- Find a container that would best hold into form the candle you have in mind. Make sure that you will be using non-flammable containers. Use glass if available, they could show the gel, choose something with a touch of aqua blue.
- Plan to have the wick like about 1.5 inches from the sides and dribble a spot of hot glue on the bottom of the container you used.
- Stick the wick on the hot glue and let it cool down for a few minutes. Don’t use cotton as core wick, zinc is the best choice.
- For the gel, cut the gel wax into small parts or cubes and place it into a container and heat it up. Make sure that the heat is not too hot or too cold. 200 Fahrenheit could make it melt well.
- Maintain the advised temperature until such time that the wax would melt and turn into a smooth and a bit thick liquid. For more attractive effects, you could use coloring materials that would create a better effect to the product.
- Do not use coloring materials that would make the gel lose its transparency. Ignore the use of water-based and paste dyes as a combination. They do not complement each others components.
- Pour ¼ of essential oil or gel scent for more effects that would make the candle “marketable”. When pouring such, add more wax cubes if there is a “cloudy” effect on the liquid.
- Scents you use must be alcohol-free. For the aquatic theme, choose a “cool” scent than those which are fruity or musky.
- When you are about to pour the candle liquid on a container, set a level mark and make sure that the liquid will not pass over it. Put some seashell beads, aquarium gravel, sand, aqua blue glitter, pebbles, and others. Do it by layer.
- Make it a point to preheat the container (150 degrees). This would minimize the presence of bubbles that may ruin the form of the finished product.
- Then pull up the wick and be sure that it goes up in the center of the candle. Let the candle cool down for 3-4 hours. Trim the wick at about ¼ inch.
- You could vary the designs of your aquatic candles by mixing and matching colors and objects like starfish and clouds, sand and stars, boat prints and pebbles are just a few of the numerous possibilities.
The sea, sand, bikinis, waves, hats, flip flops… the beautiful sights one summer afternoon could be reflected by your home made candles. This could set off as a mere pastime but entrepreneurial opportunities may knock on your door.
Gel candles are easy to make, affordable, convenient, and they could be those attractive possessions of your home.
Bees Wax Sheets for the simplest DIY Candle-making of all!
Below is a candle making kit for how to make beeswax candles - order this online and have it delivered to your door:
To make your candles you simply roll a sheet of thin beeswax around a length of candle wick.
Once it is firmly rolled into a pillar or candle cylinder you are done!
You and the kids can have a fun day making rolled beeswax candles for gifts for all the family - what fun!
Just click on the images to view the full product info:


How To Make shot glass candles for fun and profit
Shot glasses... You could see these things in drinking places, poured with liquor being shared by fun-loving people.
This is of course an instant when a single shot glass means a lot. Have you ever wondered about the other benefits of just a shot glass?
Well, there is one exciting and very useful innovation with a shot glass, which is using them to make candles. Yes, we call them shot glass candles.
Shot glass candles are really artistic and they could be very useful for the home and whatever place you think you would need them, not as mere light source but as well as having decorative purposes.
You could make our own shot glass candles. The steps to make are easy and economical.
Out of these easy steps and with a small sum of money, you would be able to start a good hobby, a good small business and a good polish for our creativity. This is also a means of recycling or re-using old candles.
· Cut old candles into pieces and place these pieces in a container. When you want to use a certain color, you could use uncolored wax for your convenience.
· Place the container into another container of boiling water. Wait until the candle pieces melt.
· When you see that the wax has melted, his is the right time o put some dye for color.
· Prepare your wicks. Cut them as they fit to the shot glasses.
· Place these wicks to the shot glasses.
· Pour the wax into the shot glasses but make sure that it does not submerge the entire length of the wick.
· When the wax has nearly set, you see to it that you adjust the wick to the center of the shot glass. Leave the shot glasses in order for the wax to completely set.
These are so simple steps to follow, make sure also that when you choose shot glasses for candle making, and choose the thicker ones for they are much safer.
For wicks, you could tie it around a toothpick before letting it lay in a shot glass. Remember to cut ¼ of it before lighting it up.
Tea Light Candles

Are you a tea or coffee lover? Having a cup of hot tea or coffee with friends is not just a great way for bonding but this is also a healthy means especially in these modern times.
Well, there are these tiny things that could really lift the spirit of a tearoom or even just a table of two reconciling lovers. Do you know what are they?
They are tea light candles. They are what you need to gently keep your pot hot and ready for drinking.
Small but useful as they are, you could make them at 1 to 2 inches in diameter and 1 to 1 and a half when it comes to height.
This is a great option for you to choose from. You would be able to think of how many candles you would need and in response to your needs and your objectives.
Tea light candles are really great add-ons to your dinner table or anywhere in your dining room.
But, those that are unscented could be a better choice since if they are aromatic; you and those who are around for a meal would get carried away with the scent and not the meal you prepared.
They could be really “in” for any special occasions or even for ordinary days.
If there are occasions and you want gather visitors in your patio, you could put tea light candles around as you savor every moment shared with those people you choose to be with.
For ordinary days, they could make it special. When you soak yourself in a bath tub, you could place these candles around to soothe your mood and feel relaxed. In this case, you could enjoy the aroma of scented candles.
Experience that glow that could set you free of the negative feelings, try lighting out tea light candles.
You just need to save the aluminum tea light containers from earlier use, or buy the kits online.
Add the tea-light wicks, which are very short, and simply pour in your wax, scented or plain.
I like to use Vanilla scented wax for my tea light candles, as that is a nice subtle aroma that works well with enjoying a cup of both coffee and tea.
Tea light candle supplies make the job simple and fast:
Just click on the images to view the full product info:


Where to get more information: Candle Making- How to Books Can Be a Lifesaver
It is important that everyone have some kind of hobby or creative pastime, such as candle making.
Candle making is a great way to clear your mind of your troubles, relieving stress, and releasing pent up energy and frustration.
It is a great hobby for people who suffer from hypertension, and can also be very fun and rewarding financially, once you master your skills.
To get started, you might want to purchase a candle making kit, which can be found in your local craft or discount store, so that you can see if you like the craft, before spending a lot of money on supplies.
The kits are relatively inexpensive, and sometimes can even be found on E-bay.
Once you have the basics down, and have decided you would like to continue making candles, you might want to do some research into more difficult styles or techniques that you could incorporate into your own work, and this is where how-to books come into play.
You may be able to find many of these books at your local public library, which will save you some cash.
You can find books that can help you learn the basic candle making techniques, provide you with time-saving tips, and even ideas and patterns for other types of candles that may pique your interest.
If you can’t find what you are looking for at the library, you should turn next to some online vendors, or perhaps even E-bay.
Take the time to look at some reviews and go over the details the book covers, before you spend your hard earned cash on it, just to make certain it is what you are looking for.
Many of the books that you can find on E-bay and other auction sites are listed by people who bought the book, and decided they either didn’t like it, or just didn’t have need of it anymore, either way, this usually works out to be for your benefit.
One book that is very popular is “The Candle Maker’s Companion", which is helpful to new candle makers and those who are advanced crafters.
For something a little easier to understand, you might want to look for a book called “the Encyclopedia of Candle Making Techniques”, which has been praised for it’s easy to understand illustrations and step-by-step guides.
For the already knowledgeable candle maker, you will want to look for more advanced books, that can help you learn new techniques and twists that can spice up your candle making experience, such as “The Complete Candle Maker Techniques, Projects, and Inspirations” book.
You are provided with detailed pictures of each candle, easy to follow instructions, and some helpful tips and tricks that can help improve your overall techniques as well.
There are many, many books out there dedicated to the art of candle making, both for novice and advanced candle makers.
No matter how skilled you are, you can always benefit from learning new information about your craft, so you should always be on the lookout for these books.
Yard sales can also be a great place to find them, as well as library book sales.
Just click on the images to view the full product info:


Want to go even further with this?
How to make candles as a
profitable business
A Glowing Business Opportunity – Making Natural Soy Candles at Home!
If you are someone who absolutely loves candles and spends quite a lot on purchasing them, then maybe it is high time you learn how to make them right in the comfort of your own home.
Candle making can not only be fun but it even offers a lucrative business opportunity.
Did you know that nearly 80% of all homes in the United States of America use candles on a regular basis?
This shows that candles are in big demand and you can reap benefits by starting a natural soy candle business of your own.
Why You Should Consider Natural Soy Candle Making
- The whole business is really easy to start and is a great opportunity for work-at-home moms.
- If you care about our environment, then you should opt for making natural soy candles. You might be aware that non-renewable petroleum products are used for making candles, but soy candles are made from natural renewable ingredients. This means that you will not be depleting away our planet’s primary fuel source by making soy candles instead of the regular ones.
- The candle industry is worth more than 2 billion dollars per year. Not a small figure by any means!
- You need not spend more money on buying candles anymore. By learning how to make soy candles at home, you will be able to cut down on your gifts expenditure by giving the candles away to friends or family. You can even use them to decorate your own home!
How Can You Start your Own Soy Candle Making Business?
You can learn the whole process of making your own soy candles. This is not exactly easy in the beginning but once you master the technique, making soy candles need not be a daunting task anymore.
Once your candles are ready for sale, you can promote them online using Etsy or auction sites like eBay. Online marketing does not require as much physical effort as offline marketing.
You can sit in the comfort of your own home and promote your products easily in a matter of minutes.
There are many online platforms that will allow you to promote your soy candles. If you are looking towards marketing candles offline then you can start by spreading the word about your business to close friends and family members.
Starting your own business can be fun and exciting. By selling your own soy candles, you are venturing into a business that has a huge scope in the marketplace.
Plus, you can feel proud of the fact that you are not associated with a trade that is harmful to the environment in any way.
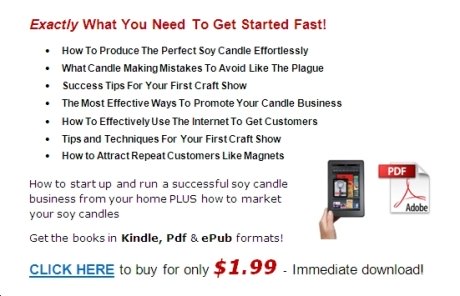
Here is some information about my How to book download in both Kindle and Pdf you can print out - and also in ePub!
On sale right now, get both books for only $1.99 - immediate download

Introducing...
Start A Soy Candle Business From Your Home!
Finally, you can get direction and guidance from a husband and wife team that has been there...done that! This is not just another soy candle making how to ebook.
This ebook is about setting up a real and solid business that you can run from your home. Plus we cover the best ways to win clients and to promote your candles.
It doesn't matter how great your candles are if nobody knows about them!
Here
is what you'll receive...
Start A Soy Candle Business From Your Home Guide + Secret Marketing Tactics - A no fluff report on exactly what it takes to start up and run a successful soy candle business from your home PLUS how to effectively market your soy candles.
You will drastically cut down the amount of time it takes for you to become successful by learning from our mistakes!
We know we could sell this information for much more but we
want to help those who really want
to
get started
now.
More Tips for How To Do It Yourself: Crafts & Creative Fun
Do you have a tip you want to contribute here? Share it!
Read the latest updates & rest of the how-to tips here:
Click the Title links below to see the latest how to do it tips and contributions to this page...
How to Make Candle Gift Baskets
Once you get some experience in making candles and soy container candles you will soon be producing them so fast and efficiently that you will end …
Guide To Making Hand Dipped Candles
These sorts of candle making projects are for the more experienced candle makers, ad it takes a long time and requires patience. (Which is why I prefer …
Why Soy Bean Candles Can Be Good To Make At Home
Making your own candles is very popular with crafters nowadays. It's most often made with paraffin wax or beeswax. But Soy candles are emerging on the …
Making Money from Learning How To Make Candles!
Experienced candle makers will tell you that there is a lot of fun to be had in making candles. Once you have perfected your basic technique, you can make …
Scented and Profitable: Candles of Course
You can just imagine how candles give that amazing effect to your home, room or any close or even open place you light them out.
Have you ever thought …
Candle Holders – Picking the Style that is Right for You
Candles are now one of the best gift ideas, source of income, way of relaxing and so forth. For a better effect and for safety reasons, it is good to have …
Customize that Candle, be Creative!
If you are in the process of learning how to make candles, you will also want to know how to decorate candles with trimmings of all sorts.
Through time, …
Make Floating Candles with beauty and style
There is this different mood being set by candles. When the lights are dimmed or totally out, there will still be that unexplainable effect when candles …
How to make gel candles as gifts
When a loved-one or any special person celebrates a memorable day of his or her life, gifts would always be at the top list. Gifts may vary from the simple …
More online resources for home made candles:
Check out these products for the best prices and convenient home delivery!Buying your products online here on these links will usually save you on retail prices and may even include free shipping to your door sometimes.
Online shopping is a great way to check out other customer reviews and make sure you make an informed choice to best meet your needs.
Just click on the images to view the full product info:


Candle PLR articles packs on sale:
Webmasters looking for fresh craft and Candle making PLR articles content will be delighted with the exclusive set of articles and bonus graphics and keyword file that I have for sale here!
Pack #1 has 5 articles and images as shown below:
Instant download 24/7 = Buy Now with secure PayPal >>
On sale only $4.50 today!
Pack #2 Candle making PLR articles has 5 articles and images as shown below:


Instant download 24/7 = Buy Now with secure PayPal >>
On sale only $4.50 today!
Pack #3 has 5 articles and images as shown below:
Instant download 24/7 = Buy Now with secure PayPal >>
On sale only $4.50 today!

"Power Tips" magazine is back!
You Get A Free Complete Self Help Report delivered to your email box every edition, plus you get a free PLR article and other great gifts!
SUBSCRIBE BELOW ... I promise you will want to USE what you learn!

I really want to know what you think of this site, this page, and to hear your tips or suggestions about it.
So please share your story or simply add a Comment in the comment box.
If you feel that the information on this page has been useful to you please give it a Like or share it with your friends - thanks!!
"You are a life Saver!!
I recently discovered this site and I can tell you that my life has not been the same. I now come here EVERYDAY and spend at least 1 hour.
I used to spend that time browsing online fashion and beauty
magazine which just means that I spend more. Now I have replaced that
habit with coming here.
In future I will think about contributing articles as well. Thank you! Thank you!! Thank you!!! and God bless"

Contact Us | About Us | Terms of Use | Privacy Policy | FAQ | Testimonials
Amazon and the Amazon logo are trademarks of Amazon.com, Inc. or its affiliates. As an Amazon Associate I earn from qualifying purchases. Product prices and availability are accurate as of the date/time
indicated and are subject to change. Any price and availability
information displayed on [relevant Amazon Site(s), as applicable] at the
time of purchase will apply to the purchase of this product.
Back to Home Page of How to Make Candles site

"Power Tips" is back!
Free Complete Self Help Report inside every edition, plus free PLR article and other great gifts!
SUBSCRIBE BELOW ... I promise you will want to USE what you learn!
You can subscribe to my RSS feed to get updated whenever new content is added here!
 Subscribe To This Site


Power Tips is back!
SelfHelp Report & free PLR
Free self help ezine:
You can subscribe to my RSS feed to get updated whenever new content is added here!
Subscribe To This Site
New! Comments
Have your say about what you just read! Leave me a comment in the box below.